Hi, I’m Deepak Dubey. The founder of this blog. I’m a Full-stack Python Developer | OpenedX professional and part-time blogger. I’m here to write the blogs related to technology stuff like Python, Django , Open-edX, Data Science, machine Learning and many more.
To get started, first we have to create a project in Google Developers Console to get client key and secret.
Creating a Google project
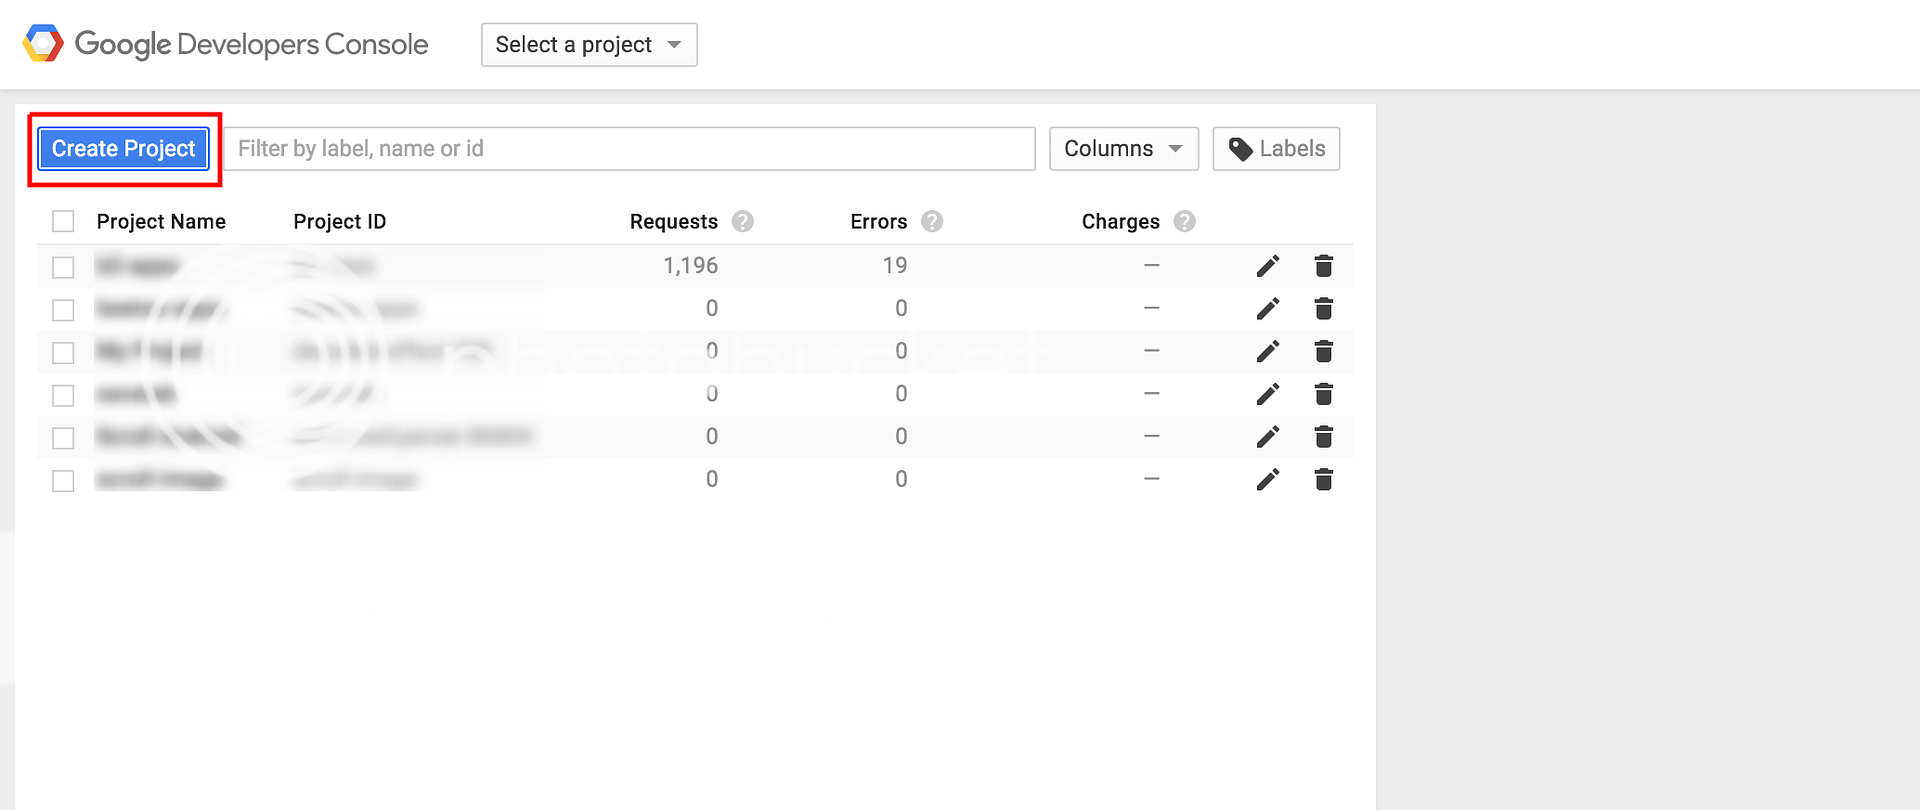
First go to Google Developers Console. Sign in using your Google credentials if you haven’t already. There will be a list of projects(if you have previously created any).
Click on Create Project to create a new project.
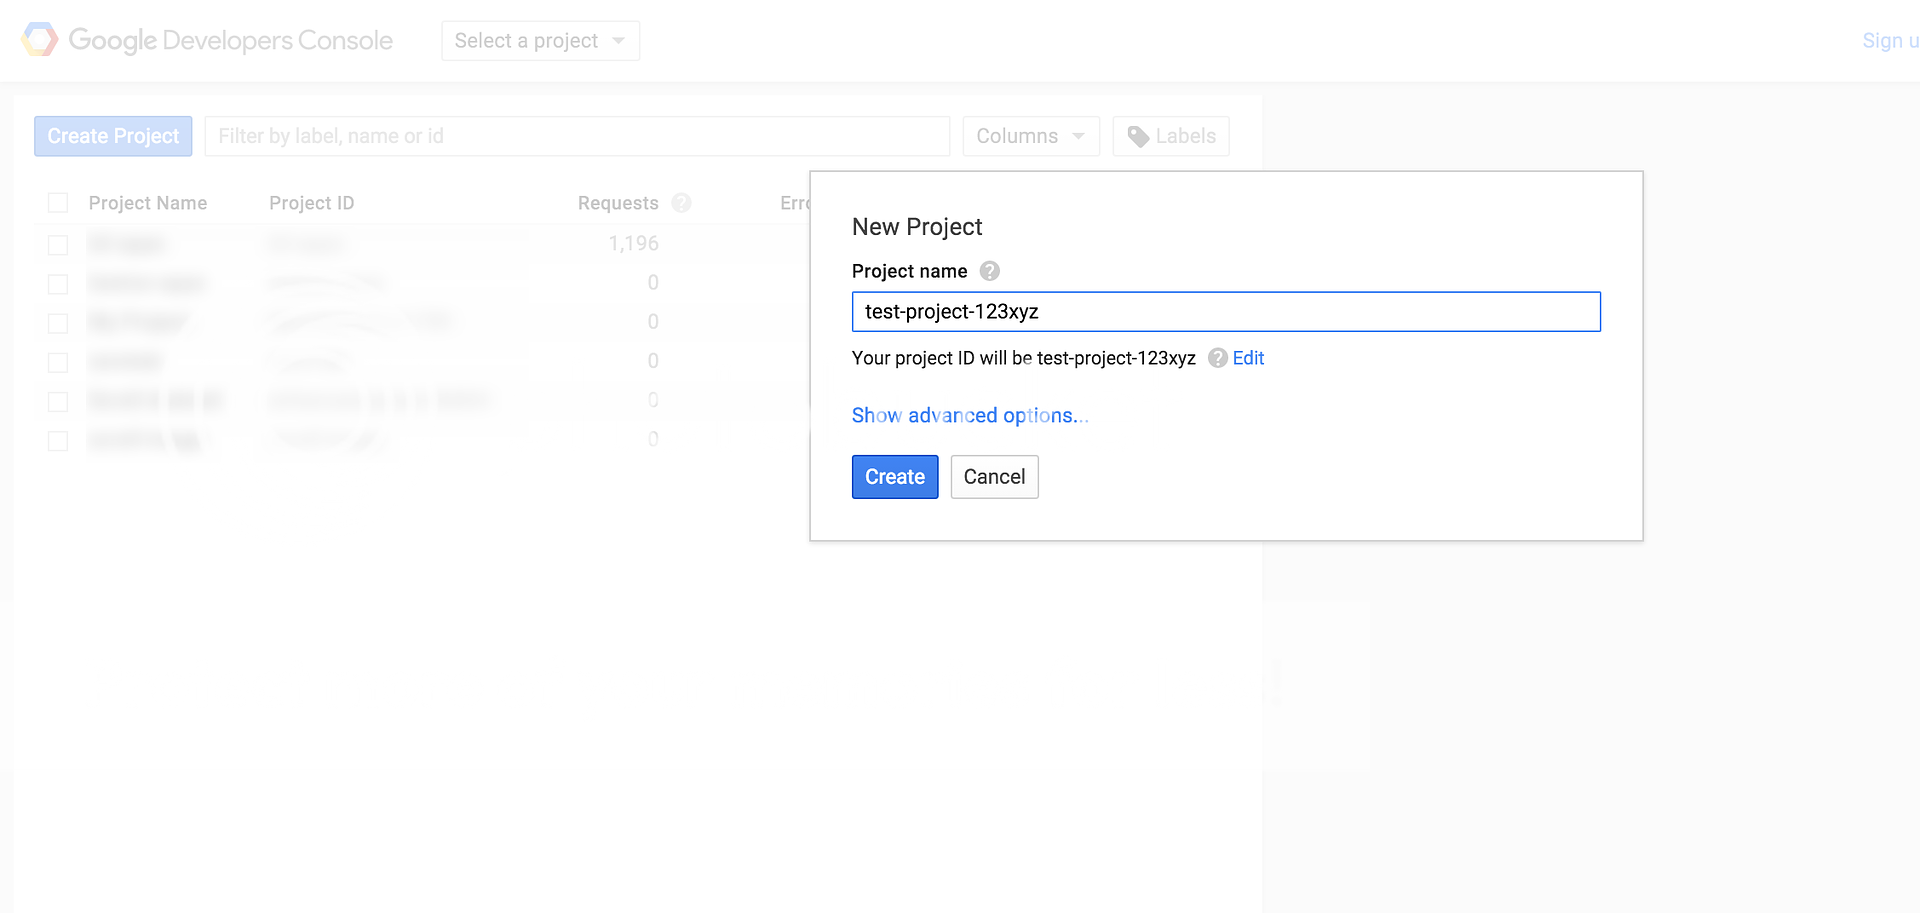
Provide a project name in the dialog box and press enter. For explanation purposes, lets say the project name is test-project-123xyz. test-project-123xyz will appear in the list of projects after creation.
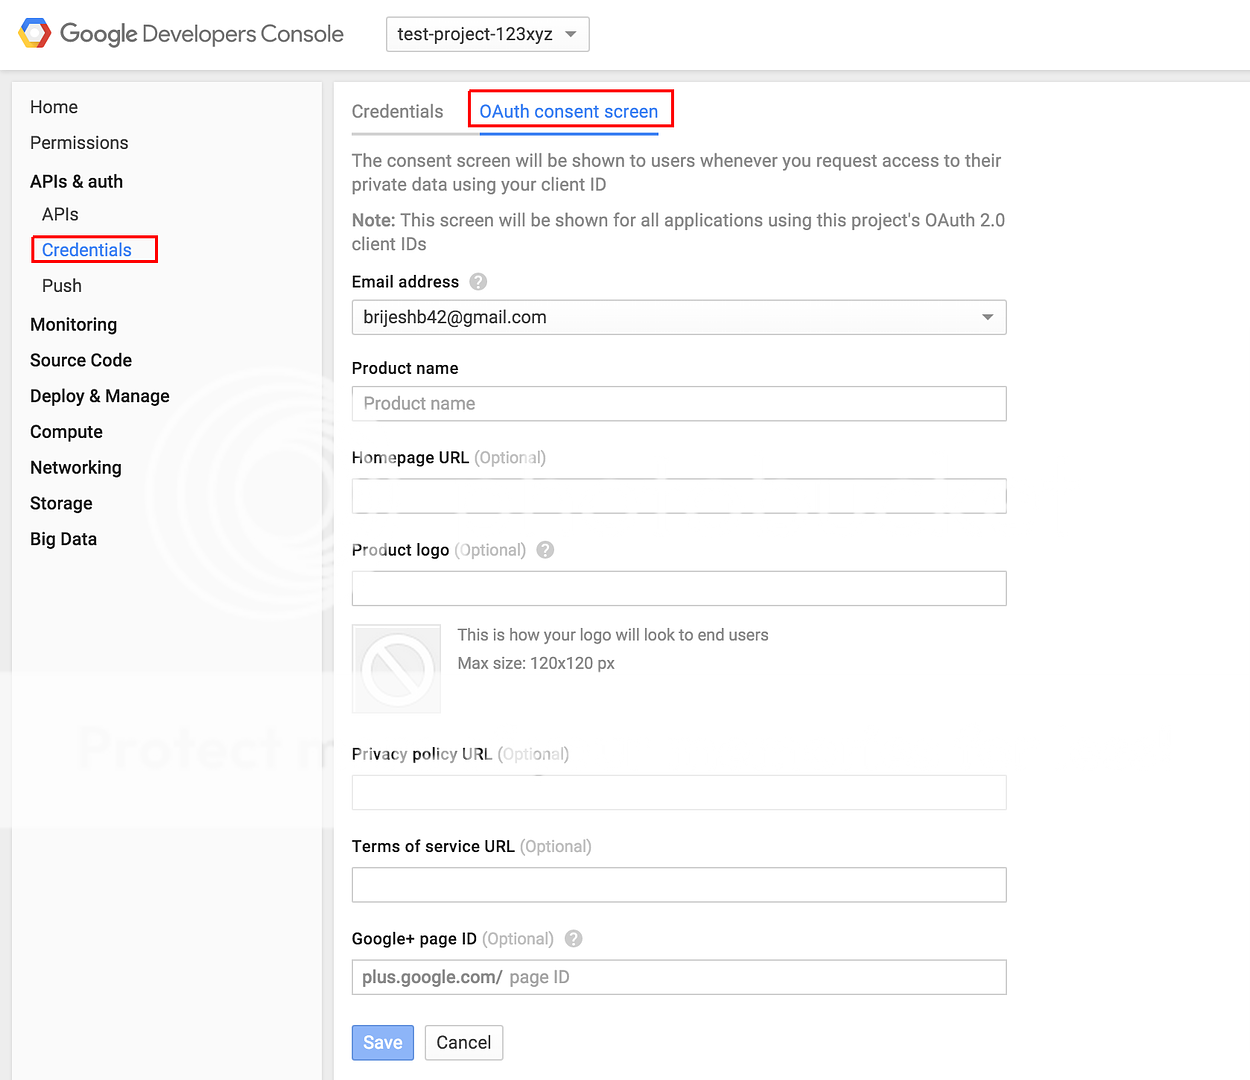
Now go to the project page. Click APIs and Auth -> Credentials in the sidebar. Then goto the OAuth Consent Screen. Provide the Product Name(you can also provide other details but they are optional). Product Name is what users see when they are logging into your application using Google.
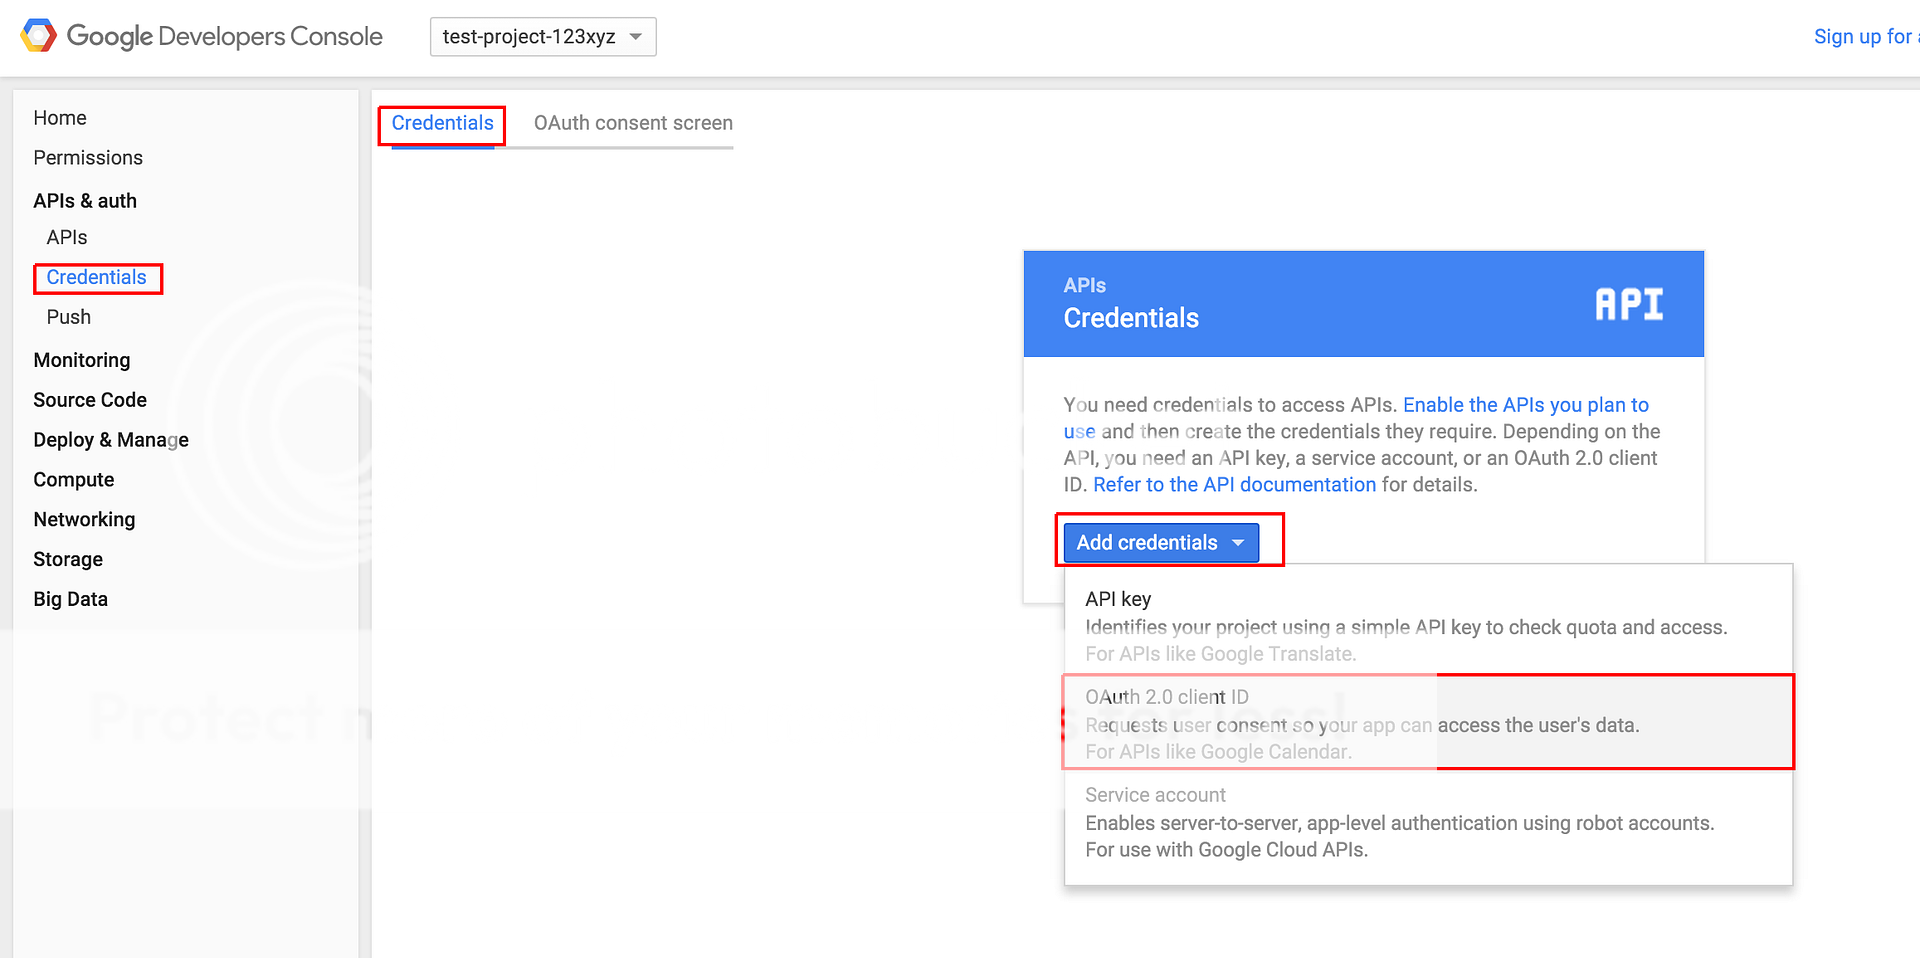
Now click on the Credentials part of the same page. Then click on Add Credentials and then select OAuth 2.0 client ID.
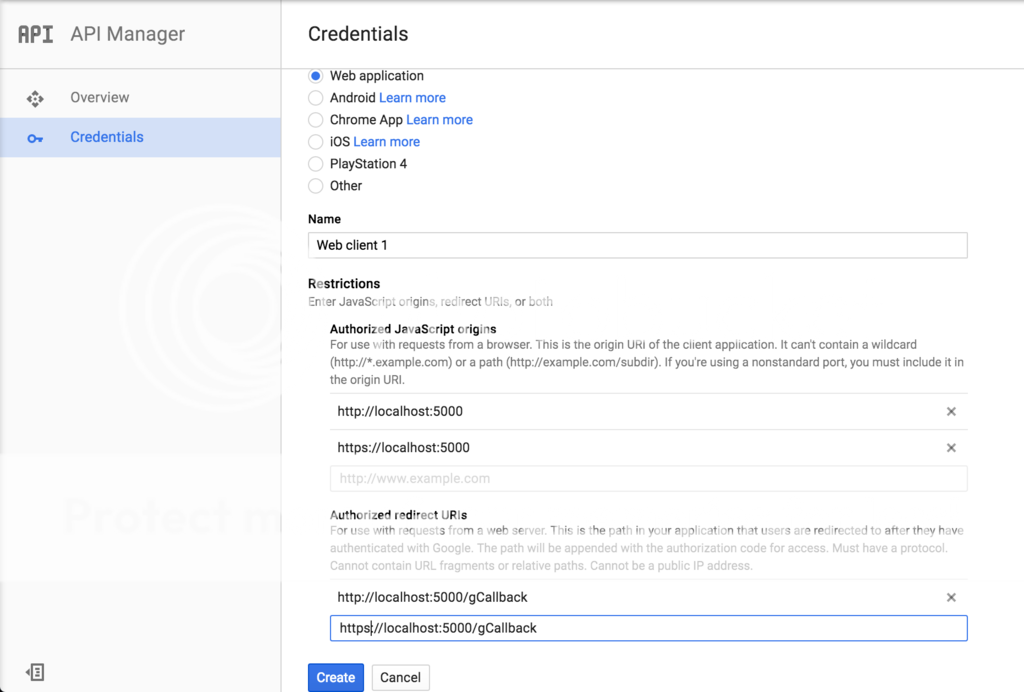
Select Application Type as Web Application, Provide a Name, Authorized Javascript origins and Authorized redirect URIs and click on Create. During development, we will use localhost as our URL. Later, for production, we can add our original URL. The redirect URIs is important here as this is the URL the users will be redirected to after Google Login. Make sure that all the urls use httpsprotocol as OAuth2 supports only https.
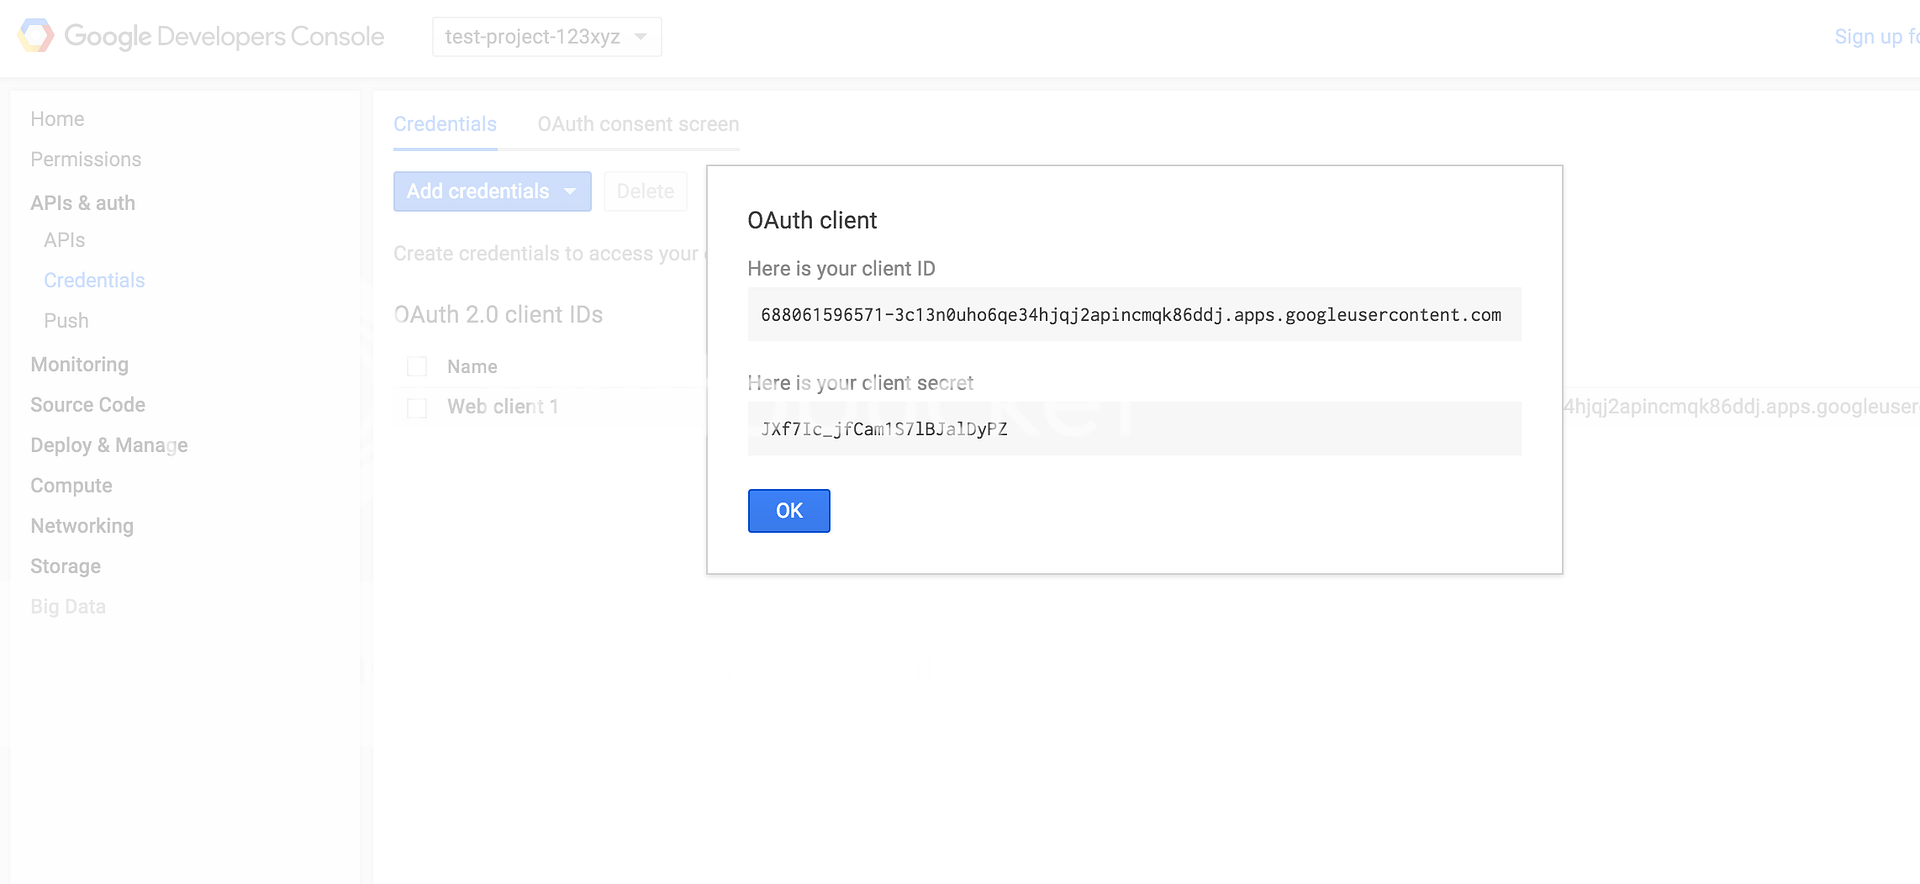
After the above step, you will be presented with a dialog box having your client IDand client secret. Copy both the strings and save in a text file as we will be needing these later.
Creating a User table in Database
We will be using flask-sqlalchemy to handle DB operations. This is what our User table looks like.
The tokens column stores the access and refresh tokens JSON, dumped as string.
Creating configuration for our app.
If using flask-login to manage user sessions, we can check whether a user is logged in or not. If not logged in, we redirect the user to a login page that contains the link to Google login. Lets create a config.py that has our Google OAuth credentials and our app configuration.
importosbasedir=os.path.abspath(os.path.dirname(__file__))classAuth:CLIENT_ID=('688061596571-3c13n0uho6qe34hjqj2apincmqk86ddj''.apps.googleusercontent.com')CLIENT_SECRET='JXf7Ic_jfCam1S7lBJalDyPZ'REDIRECT_URI='https://localhost:5000/gCallback'AUTH_URI='https://accounts.google.com/o/oauth2/auth'TOKEN_URI='https://accounts.google.com/o/oauth2/token'USER_INFO='https://www.googleapis.com/userinfo/v2/me'classConfig:APP_NAME="Test Google Login"SECRET_KEY=os.environ.get("SECRET_KEY")or"somethingsecret"classDevConfig(Config):DEBUG=TrueSQLALCHEMY_DATABASE_URI='sqlite:///'+os.path.join(basedir,"test.db")classProdConfig(Config):DEBUG=TrueSQLALCHEMY_DATABASE_URI='sqlite:///'+os.path.join(basedir,"prod.db")config={"dev":DevConfig,"prod":ProdConfig,"default":DevConfig}
Here,
REDIRECT_URI is what we set in Google Developers Console,
AUTH_URI is where the user is taken to for Google login,
TOKEN_URI is used to exchange a temporary token for an access_token and
USER_INFO is the URL used for retrieving user information like name, email, etc after successful authentication.
SCOPE is the types of user information that we will be accessing after the user authenticates our app. Google OAuth2 Playground has a list of scopes that can be added.
Implementing the URL routes for login and callback
After the configuration is done, we have to create a Flask app, load configurations and finally define our routes.
This route is only served to logged in user. If a user is not logged in, they are redirected to login route as set previously using login_manager.login_view = "login".
Here we save the value of state in cookie using session['oauth_state'] = stateto be used later.
Callback URL:
Here, the route gCallback must be the same as we mentioned in our project page in Google Developers Console.
@app.route('/gCallback')defcallback():# Redirect user to home page if already logged in.ifcurrent_userisnotNoneandcurrent_user.is_authenticated:returnredirect(url_for('index'))if'error'inrequest.args:ifrequest.args.get('error')=='access_denied':return'You denied access.'return'Error encountered.'if'code'notinrequest.argsand'state'notinrequest.args:returnredirect(url_for('login'))else:# Execution reaches here when user has# successfully authenticated our app.google=get_google_auth(state=session['oauth_state'])try:token=google.fetch_token(Auth.TOKEN_URI,client_secret=Auth.CLIENT_SECRET,authorization_response=request.url)exceptHTTPError:return'HTTPError occurred.'google=get_google_auth(token=token)resp=google.get(Auth.USER_INFO)ifresp.status_code==200:user_data=resp.json()email=user_data['email']user=User.query.filter_by(email=email).first()ifuserisNone:user=User()user.email=emailuser.name=user_data['name']print(token)user.tokens=json.dumps(token)user.avatar=user_data['picture']db.session.add(user)db.session.commit()login_user(user)returnredirect(url_for('index'))return'Could not fetch your information.'
In the above code,
We check if a user is already logged in. If yes, we then redirect them to the home page.
Then we check if the url has an error query parameter. This check is done to handle cases where a user after going to the Google login page, denies access. We then return an appropriate message to the user.
We then check if the url contains code and state parameters or not. If these are not in the URL, this means that someone tried to access the URL directly. So we redirect them to the login page.
After handling all the side cases, we finally handle the case where the user has successfully authenticated our app.
In this case, we create a new OAuth2Session object by passing the stateparameter.
Then we try to get an access_token from Google using
From the comments, I have come to know that many of you have been running into problems with successfully running the flask server. It was a mistake from my side which I have realized in last few days.
In Step 6 above, while adding a redirect uri in the Google Project Console, I attached a screenshot in which, the redirect uri was http://localhost:5000/gCallbackinstead of it starting with https. So I have updated the screenshot in which I have added both http and https. You should add both http and https URLs as redirect uri. Also add both http://localhost:5000 and https://localhost:5000 in the Authorized Javascript Origins.
Also if you want to simply run the flask server on http instead of https, add the following 2 lines of code at the top of your app.py
Also Have a look some common configurations related changes:
STEP 1.
First go to Google Developers Console. Sign in using your Google credentials if you haven’t already. There will be a list of projects.
STEP 2.
Then Create new projects in credential select oauth2 and give correct url of your project .
STEP 3.
After you will be presented with a dialog box having your client ID and client secret. Copy both the strings and save in a text file as we will be needing these later.
STEP 4.
Then Create token field in database which will stores the access and refresh tokens JSON, dumped as string.
STEP 5.
If using flask-login to manage user sessions, we can check whether a user is logged in or not. If not logged in, we redirect the user to a login page that contains the link to Google login.create Auth Class in config.py and defined variables for
redirect_url is what we set in Google Developers Console,
Auth_url is where the user is taken to for Google login,
token_urlI is used to exchange a temporary token for an access_token and
user_info is the URL used for retrieving user information like name, email, etc after successful authentication.
Scope is the types of user information that we will be accessing after the user authenticates our app. Google OAuth2 Playground has a list of scopes that can be added.
STEP 6.
We create a helper function get_google_auth that we will use to create OAuth2Session object based on the arguments provided(state,token).
When none of the parameters are provided, e.g. google = get_google_auth(), it creates a new OAuth2Session with a new state.
If state is provided, that means we have to get a token.
If token is provided, that means we only have to get an access_token and this is the final step.
STEP 7.
Then in login view create google authorization url using oauth session given by helper function google = get_google_auth(), render it in template.
auth_url, state = google.authorization_url( Auth.AUTH_URI, access_type='offline')
STEP 8.
Then in callback function :
We check if a user is already logged in. If yes, we then redirect them to the home page.
Then we check if the url has an error query parameter. This check is done to handle cases where a user after going to the Google login page, denies access. We then return an appropriate message to the user.
We then check if the url contains code and state parameters or not. If these are not in the URL, this means that someone tried to access the URL directly. So we redirect them to the login page.
After handling all the side cases, we finally handle the case where the user has successfully authenticated our app.
In this case, we create a new OAuth2Session object by passing the stateparameter.
Then we try to get an access_token from Google using
Hi , Lets get start with some utility which can be really helpful in extracting the text data from passport documents which can be images, pdf. So instead of jumping to code directly lets understand the MRZ, & how it works basically. MRZ Parser : A machine-readable passport (MRP) is a machine-readable travel document (MRTD) with the data on the identity page encoded in optical character recognition format Most travel passports worldwide are MRPs. It can have 2 lines or 3 lines of machine-readable data. This method allows to process MRZ written in accordance with ICAO Document 9303 (endorsed by the International Organization for Standardization and the International Electrotechnical Commission as ISO/IEC 7501-1)). Some applications will need to be able to scan such data of someway, so one of the easiest methods is to recognize it from an image file. I 'll show you how to retrieve the MRZ infor...
A class diagram in the Unified Modeling Language ( UML ) is a type of static structure diagram that describes the structure of a system by showing the system’s classes, their attributes, operations (or methods), and the relationships among objects. https://github.com/django-extensions/django-extensions Step 1: Install django extensions Command: pip install django-extensions Step 2: Add to installed apps INSTALLED_APPS = ( ... 'django_extensions' , ... ) Step 3: Install diagrams generators You have to choose between two diagram generators: Graphviz or Dotplus before using the command or you will get: python manage.py graph_models -a -o myapp_models.png Note: I prefer to use pydotplus as it easier to install than Graphviz and its dependencies so we use pip install pydotplus . Command: pip install pydotplus Step 4: Generate diagrams Now we have everything installed...
Objectives By the end of this post, you will be able to… Describe the difference between a Python wheel and egg Explain why you may want to build Python wheel files within a Docker container Spin up a custom environment for building Python wheels using Docker Bundle and deploy a Python project to an environment without access to the Internet Explain how this deployment setup can be considered immutable Scenario The genesis for this post came from a scenario where I had to distribute a legacy Python 2.7 Flask app to a Centos 5 box that did not have access to the Internet due to security reasons. Python wheels (rather than eggs) are the way to go here. Python wheel files are similar to eggs in that they are both just zip archives used for distributing code. Wheels differ in that they are installable but not executable. They are also pre-compiled, which saves the user from having to build the packages themselves; and, thus, speeds up the installation process....