Setup Google Analytics on Open edX
Get Google Analytics working on your Open edX platform with this simple step-by-step how-to guide. Covers Google site verification, Javascript snippet installation, Open edX code modifications.
Summary
In this article we’ll add Google Analytics’ Javascript code snippet to every page on our Open edX site. To accomplish this we’ll need to modify the main Django/Mako template for the site, which is located in /edx/app/edxapp/edx-platform/lms/templates/main.html and can be overridden by your own template of the same name in your custom theme. Here are the steps:
- Verify Your Site With Google
- Modify the main.html Mako template
- Restart the server
- Verify Your Results
If you’re just getting started then you can read more here: Set up Google Analytics tracking with gtag.js.
Take note that you’ll find parameters in lms.env.json for Google Analytics, HOWEVER, as of the current Ginkgo.2 release the main Mako template contains what appears to be an out-of-date Google Analytics javascript snippet. Or at least, the snippet in the Mako template is inconsistent with the snippet that Google Analytics requests that you add to the section of your pages. Furthermore, upon closer inspection I also stumbled across what appears to be some legacy Google site verification data that really should be deleted from your site.
Verify Your Site With Google
If you haven’t already do so, Google will require that you first verify that you control your site. That is, Google will only allow you to gather site analytics on a site that you actually control. Google gives you a few ways to prove that you control the site, with the preferred method being to add a Google-provided CNAME to your DNS records. If for any reason you’re unable to modify your DNS records then alternatively, you can add an html file with a verification code to the root of your site. In the case of Open edX, how to accomplish this not intuitively obvious, and so if you need, you can read my article on How To Add A Static Page To Open edX.
Modify the main.html Mako template
- If you’re using a custom template then you should copy /edx/app/edxapp/edx-platform/lms/templates/main.html into your templates folder.
- Find and delete the meta tag “google-site-verification” on approximately row 122
- find and delete the following templated javascript snippet:
<% ga_acct = static.get_value("GOOGLE_ANALYTICS_ACCOUNT", settings.GOOGLE_ANALYTICS_ACCOUNT) %>
% if ga_acct:
    <script type="text/javascript">
    var _gaq = _gaq || [];
    _gaq.push(['_setAccount', '${ga_acct | n, js_escaped_string}']);
    _gaq.push(['_trackPageview']);

    (function() {
      var ga = document.createElement('script'); ga.type = 'text/javascript'; ga.async = true;
      ga.src = ('https:' == document.location.protocol ? 'https://ssl' : 'http://www') + '.google-analytics.com/ga.js';
      var s = document.getElementsByTagName('script')[0]; s.parentNode.insertBefore(ga, s);
    })();
    </script>
% endif
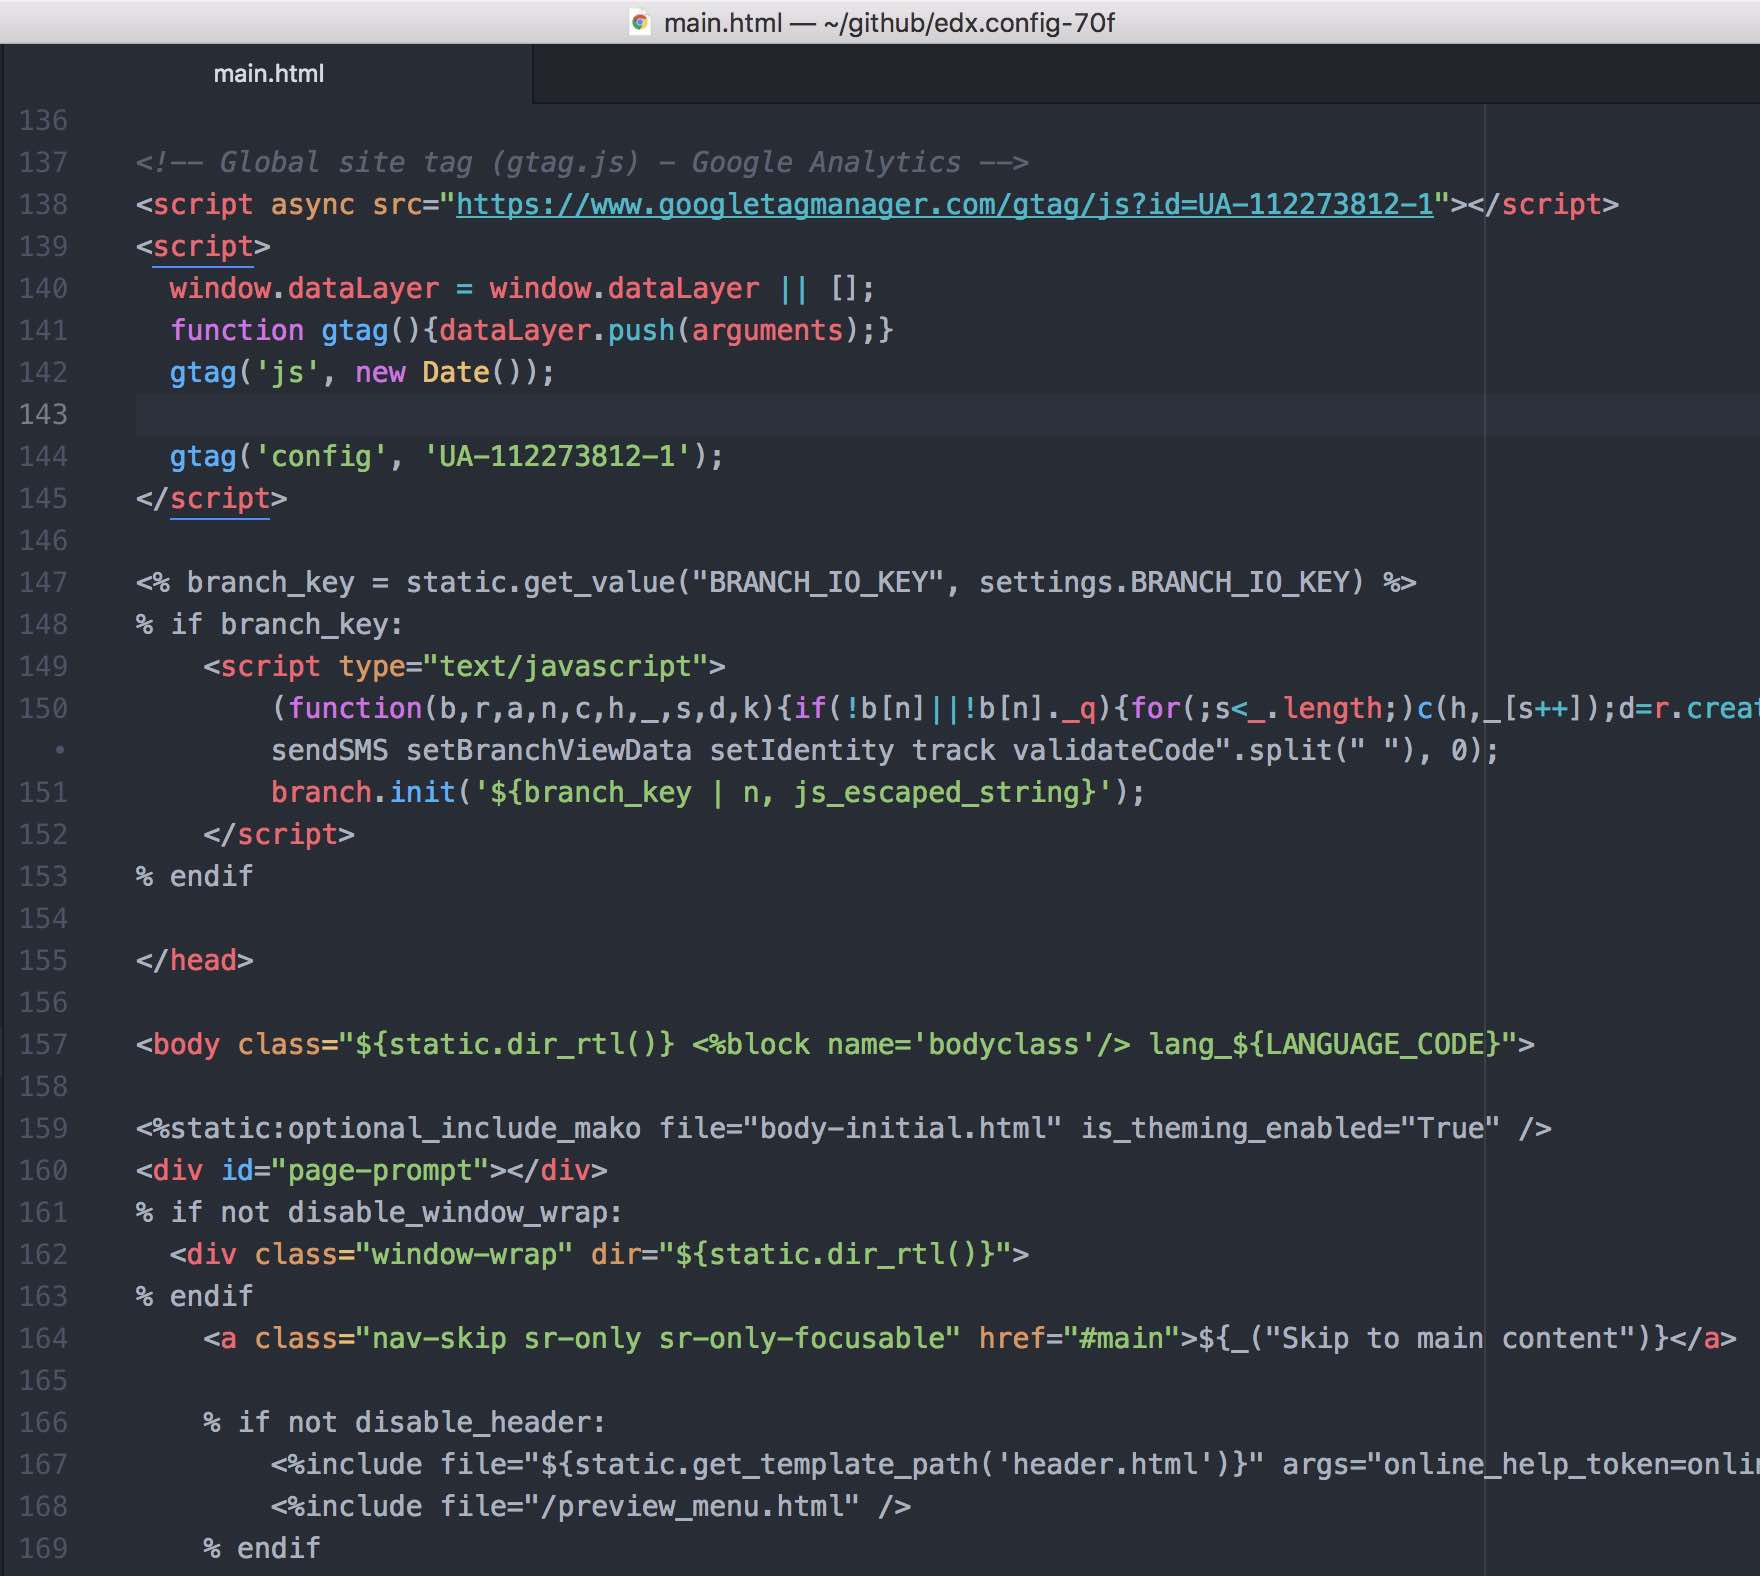
- In approximately the same location, add the code snippet provided by Google Analytics, which should look more or less like the following:
<!-- Global site tag (gtag.js) - Google Analytics -->
<script async src="https://www.googletagmanager.com/gtag/js?id=UA-123456789-1"></script>
<script>
  window.dataLayer = window.dataLayer || [];
  function gtag(){dataLayer.push(arguments);}
  gtag('js', new Date());

  gtag('config', 'UA-123456789--1');
</script>
After you finish, your main.html Mako template should resemble this screen shot example
Restart Your Open edX Server
You must restart the Open edX platform in order for these modifications to take effect. Execute the following from the command line of your Open edX instance:
/edx/bin/supervisorctl restart edxapp:
/edx/bin/supervisorctl restart edxapp_worker:
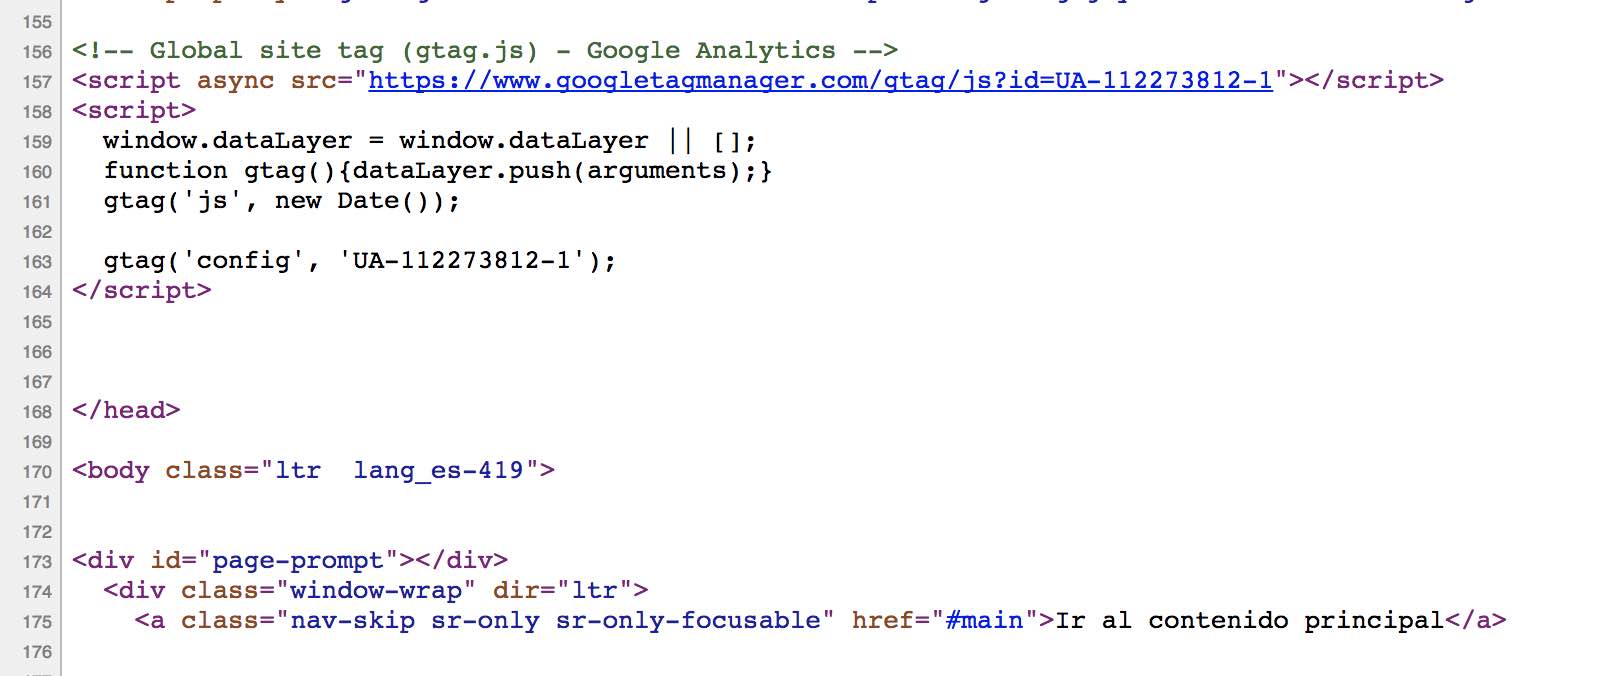
Verify Your Results
If you followed each step correctly then you’ll see your Google Javascript snipped in the HTML of any page from your site. The snippet will appear around row 160 or so.