Object Detection with 10 lines of code
One of the important fields of Artificial Intelligence is Computer Vision. Computer Vision is the science of computers and software systems that can recognize and understand images and scenes. Computer Vision is also composed of various aspects such as image recognition, object detection, image generation, image super-resolution and more. Object detection is probably the most profound aspect of computer vision due the number practical use cases. In this tutorial, I will briefly introduce the concept of modern object detection, challenges faced by software developers, the solution my team has provided as well as code tutorials to perform high performance object detection.
Object detection refers to the capability of computer and software systems to locate objects in an image/scene and identify each object. Object detection has been widely used for face detection, vehicle detection, pedestrian counting, web images, security systems and driverless cars. There are many ways object detection can be used as well in many fields of practice. Like every other computer technology, a wide range of creative and amazing uses of object detection will definitely come from the efforts of computer programmers and software developers.
Getting to use modern object detection methods in applications and systems, as well as building new applications based on these methods is not a straight forward task. Early implementations of object detection involved the use of classical algorithms, like the ones supported in OpenCV, the popular computer vision library. However, these classical algorithms could not achieve enough performance to work under different conditions.
The breakthrough and rapid adoption of deep learning in 2012 brought into existence modern and highly accurate object detection algorithms and methods such as R-CNN, Fast-RCNN, Faster-RCNN, RetinaNet and fast yet highly accurate ones like SSD and YOLO. Using these methods and algorithms, based on deep learning which is also based on machine learning require lots of mathematical and deep learning frameworks understanding. There are millions of expert computer programmers and software developers that want to integrate and create new products that uses object detection. But this technology is kept out of their reach due to the extra and complicated path to understanding and making practical use of it.
My team realized this problem months ago, which is why I and John Olafenwabuilt ImageAI , a python library that lets programmers and software developers easily integrate state-of-the-art computer vision technologies into their existing and new applications, using just few lines of code.
To perform object detection using ImageAI, all you need to do is
- Install Python on your computer system
- Install ImageAI and its dependencies
3. Download the Object Detection model file
4. Run the sample codes (which is as few as 10 lines)
Now let’s get started.
1) Download and install Python 3 from official Python Language website
2) Install the following dependencies via pip:
i. Tensorflow
pip install tensorflow
ii. Numpy
pip install numpy
iii. SciPy
pip install scipy
iv. OpenCV
pip install opencv-python
v. Pillow
pip install pillow
vi. Matplotlib
pip install matplotlib
vii. H5py
pip install h5py
viii. Keras
pip install keras
ix. ImageAI
pip installhttps://github.com/OlafenwaMoses/ImageAI/releases/download/2.0.1/imageai-2.0.1-py3-none-any.whl
3) Download the RetinaNet model file that will be used for object detection via this link.
Great. Now that you have installed the dependencies, you are ready to write your first object detection code. Create a Python file and give it a name (For example, FirstDetection.py), and then write the code below into it. Copy the RetinaNet model file and the image you want to detect to the folder that contains the python file.
FirstDetection.py
*********************************************************
*********************************************************
from imageai.Detection import ObjectDetection
import os

execution_path = os.getcwd()

detector = ObjectDetection()
detector.setModelTypeAsRetinaNet()
detector.setModelPath( os.path.join(execution_path , "resnet50_coco_best_v2.0.1.h5"))
detector.loadModel()
detections = detector.detectObjectsFromImage(input_image=os.path.join(execution_path , "image.jpg"), output_image_path=os.path.join(execution_path , "imagenew.jpg"))

for eachObject in detections:
    print(eachObject["name"] + " : " + eachObject["percentage_probability"] )
*********************************************************
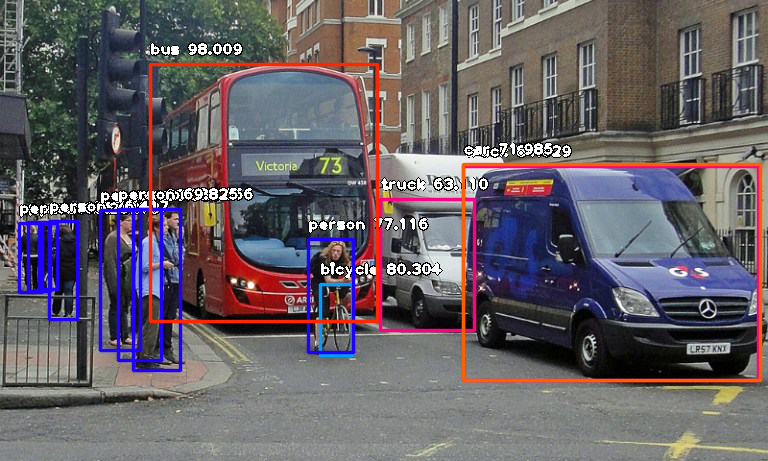
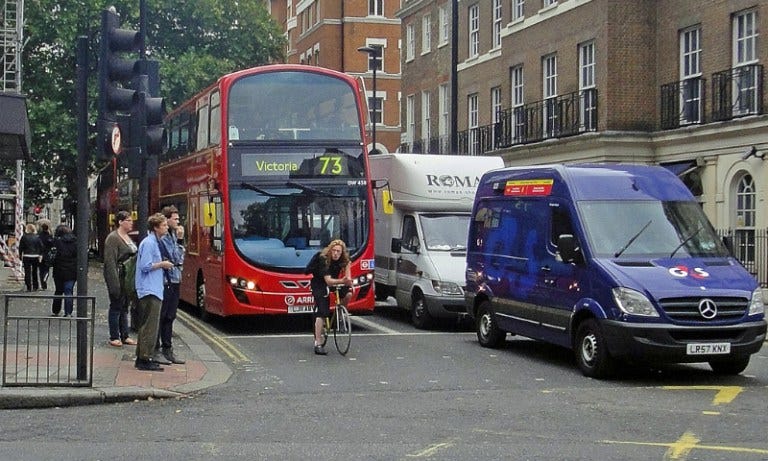
Then run the code and wait while the results prints in the console. Once the result is printed to the console, go to the folder in which your FirstDetection.py is and you will find a new image saved. Take a look at a 2 image samples below and the new images saved after detection.
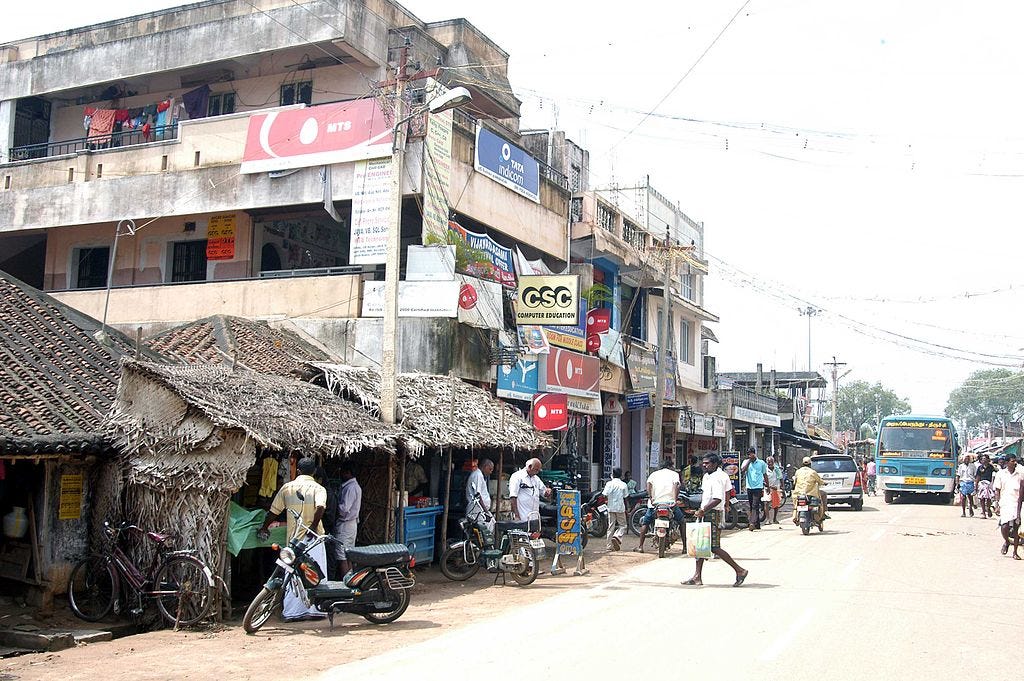
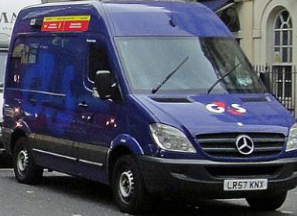
Before Detection:
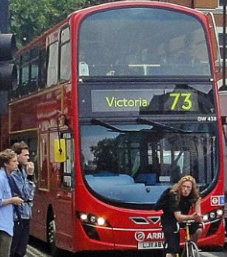
After Detection:
Console result for above image:
person : 55.8402955532074
person : 53.21805477142334
person : 69.25139427185059
person : 76.41745209693909
bicycle : 80.30363917350769
person : 83.58567953109741
person : 89.06581997871399
truck : 63.10953497886658
person : 69.82483863830566
person : 77.11606621742249
bus : 98.00949096679688
truck : 84.02870297431946
car : 71.98476791381836
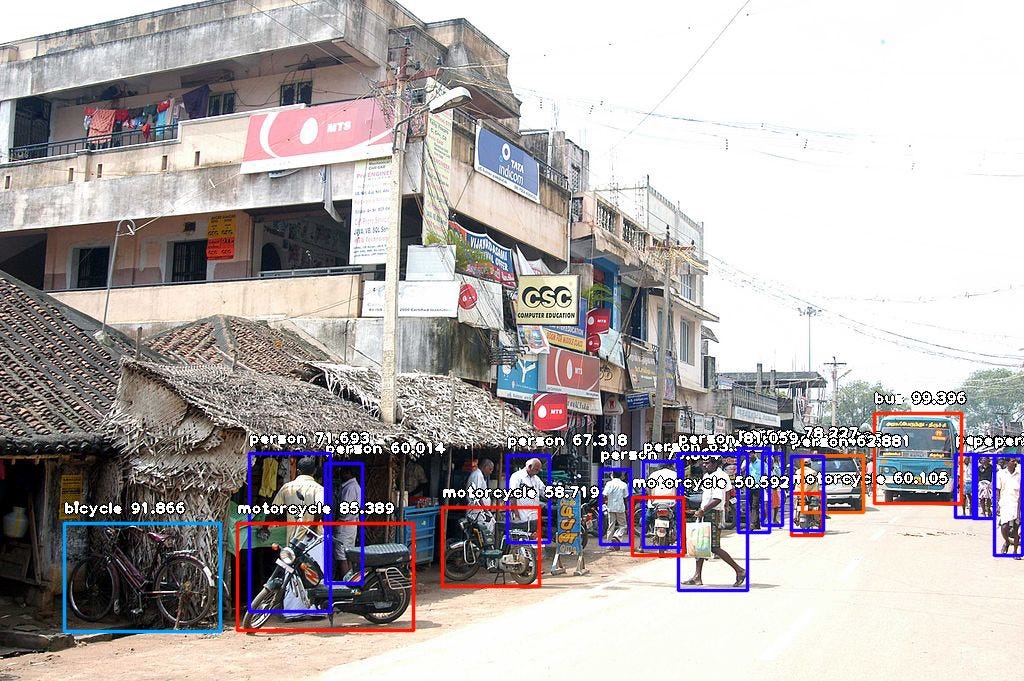
Console result for above image:
person : 71.10445499420166
person : 59.28672552108765
person : 59.61582064628601
person : 75.86382627487183
motorcycle : 60.1050078868866
bus : 99.39600229263306
car : 74.05484318733215
person : 67.31776595115662
person : 63.53200078010559
person : 78.2265305519104
person : 62.880998849868774
person : 72.93365597724915
person : 60.01397967338562
person : 81.05944991111755
motorcycle : 50.591760873794556
motorcycle : 58.719027042388916
person : 71.69321775436401
bicycle : 91.86570048332214
motorcycle : 85.38855314254761
Now let us explain how the 10-line code works.
In the above 3 lines, we imported the ImageAI object detection class in the first line, imported the python os class in the second line and defined a variable to hold the path to the folder where our python file, RetinaNet model file and images are in the third line.
In the 5 lines of code above, we defined our object detection class in the first line, set the model type to RetinaNet in the second line, set the model path to the path of our RetinaNet model in the third line, load the model into the object detection class in the fourth line, then we called the detection function and parsed in the input image path and the output image path in the fifth line.
In the above 2 lines of code, we iterate over all the results returned by the detector.detectObjectsFromImage function in the first line, then print out the name and percentage probability of the model on each object detected in the image in the second line.
ImageAI supports many powerful customization of the object detection process. One of it is the ability to extract the image of each object detected in the image. By simply parsing the extra parameter extract_detected_objects=True into the detectObjectsFromImagefunction as seen below, the object detection class will create a folder for the image objects, extract each image, save each to the new folder created and return an extra array that contains the path to each of the images.
Let us apply it to the first image and see some of the images from the result below:

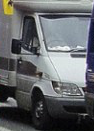

All the pictures of the pedestrians were extracted has well. I did not include all of them has they will take unnecessary space.
ImageAI provides many more features useful for customization and production capable deployments for object detection tasks. Some of the features supported are:
- Adjusting Minimum Probability: By default, objects detected with a probability percentage of less than 50 will not be shown or reported. You can increase this value for high certainty cases or reduce the value for cases where all possible objects are needed to be detected.
- Custom Objects Detection: Using a provided CustomObject class, you can tell the detection class to report detections on one or a few number of unique objects.
- Detection Speeds: You can reduce the time it takes to detect an image by setting the speed of detection speed to “fast”, “faster” and “fastest”.
- Input Types: You can specify and parse in file path to an image, Numpy array or file stream of an image as the input image
- Output Types: You can specify that the detectObjectsFromImage function should return the image in the form of a file or Numpy array
You can find all the details and documentation of how to make use of the above features, as well as other computer vision features contained in ImageAI on the official GitHub repository.