Step's to add Custom Static Page to Open-edX
Learn how to add a custom static web page to your Open edX installation. This simple step-by-step how-to guide explains how to register the page with the Django router and where to store it on your Ubuntu server so that Nginx will serve it from the root of your site.
Summary
The architects of Open edX software made it easy for you to add static content to your site; that is, once you’ve seen a working example. Actually, technically, you can add any static digital content that you intend to access via a static URL. For example, you can add any of the following using this simple procedure:
- a static web page that includes your site’s theme styling and includes the site’s header and footer.
- a replacement Favicon ico file
- a human.txt file
- a google site verification html file
- a sitemap.xml
In this tutorial we’ll add a Google Site Verification html page to our site. This seems to be one of the more common reasons to add a custom static file to an Open edX site, and hence, a pretty good example. To accomplish this we’ll perform the following steps:
- Register the URL and static file name in lms.env.json
- Upload the static file to it’s correct location on your Open edX server
- Restart the server
- Verify Your Results
Register the URL and static file name in lms.env.json
A really cool feature of the Open edX platform architecture is that, to add a custom static page, it’s actually not necessary to touch Django. All you have to do is register your custom static page in the LMS environment configuration file located in /edx/app/edxapp/lms.env.json. The underlying Open edX platform framework provides a back door within the config file that you can use to register a custom static page. look for the parameter ‘MKTG_URL_LINK_MAP’, located somewhere around row 260 in lms.env.json. By default this parameter contains an empty array of key-value pairs. the ‘Key’ is the URI piece of the fully-qualified URL for your static content. The key is not case sensitive. The ‘Value’is the exact filename of your static content. The file name is case sensitive. You should not include the path to the file. The ‘MKTG_URL_LINK_MAP’ for my example site in this article contains entries for three static files:
"MKTG_URL_LINK_MAP": {
      "HUMANS.TXT" : "humans.txt",
      "CREDIT" : "credit.html",
      "google2a2fd1c0bf50abca.html" : "google2a2fd1c0bf50abca.html"
    },
While this article only depends on the last array element, I thought it’d be a good idea to include the other two elements in order to demonstrate the correct array syntax for this parameter.
Upload the static file to it’s correct location on your Open edX server
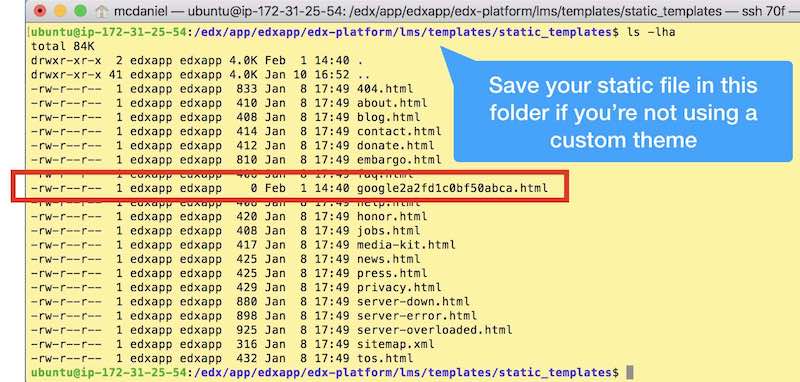
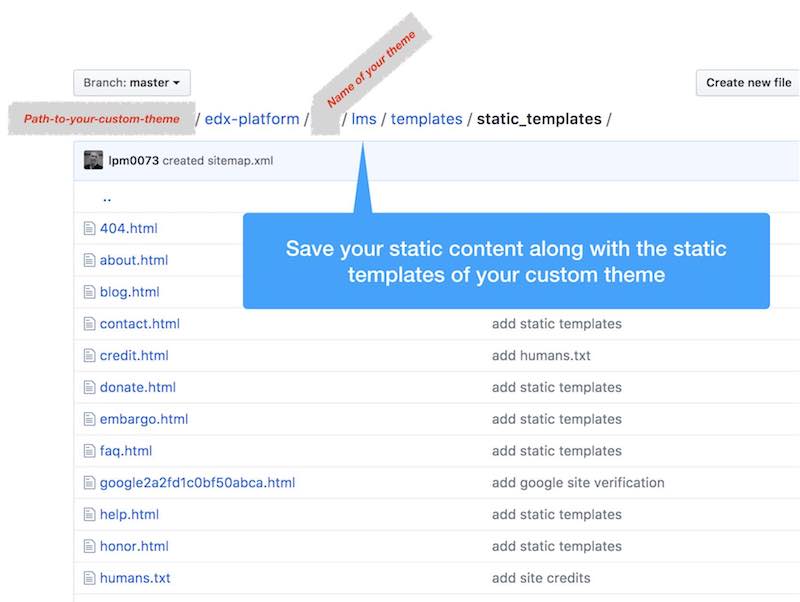
To make our static file accessible from the root of the site we’ll upload the file to the Mako template folder location /edx/app/edxapp/edx-platform/lms/templates/main.html, noting that the contents of this folder can be overridden and supplemented by the corresponding path within your custom theme.
Restart Your Open edX Server
You must restart the Open edX platform in order for these modifications to take effect. Execute the following from the command line of your Open edX instance:
/edx/bin/supervisorctl restart edxapp:
/edx/bin/supervisorctl restart edxapp_worker:
Verify Your Results
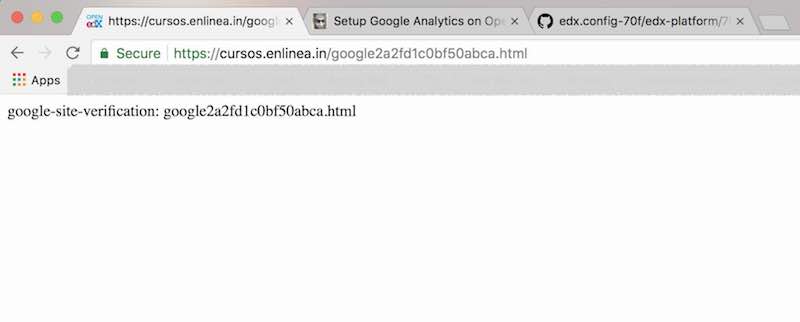
Cool, it works! We can see from the screen shot on the left that the new custom static page we registered in lms.env.json is accessible from the root of the site, and this URL correctly opens the static file that we saved in step 2.


